


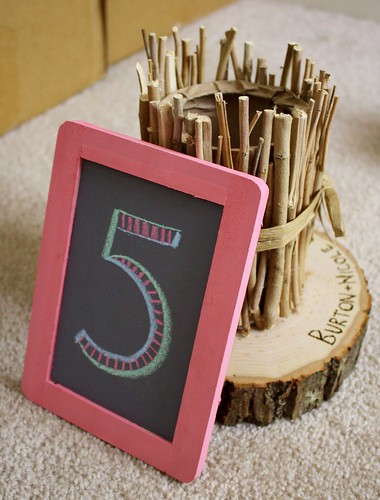

Except for the plant life, our centerpieces are complete! You've already seen how I made our painted chalkboard table numbers, but let me show you how I made the twiggy vase, inspired by this photo.

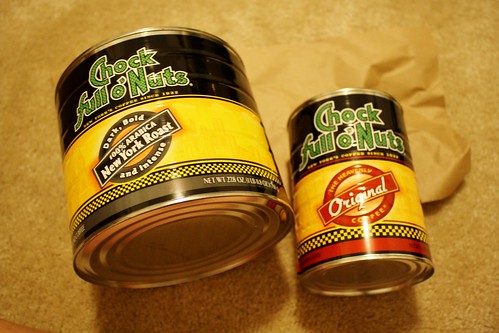
Start collecting coffee tins & a whole bunch of twigs. You could rummage through some woods for the twigs or buy them online. Either way, make sure they are cut to similar lengths, going an inch or two taller than the coffee tin. (It also helps to have a puppy nearby!)
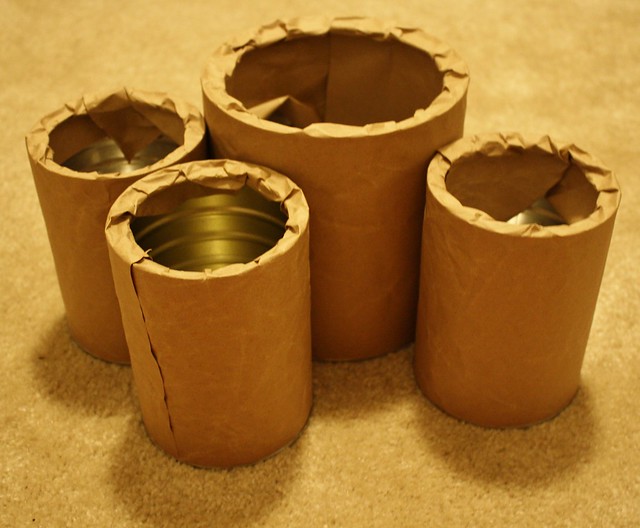
Cover the tins with a little bit of glue & brown packaging paper. Cut the paper a little taller than the tins so you can fold it inside, hiding the metallic rims. This will keep the coffee logos from peeking out through the twigs when you glue them down.

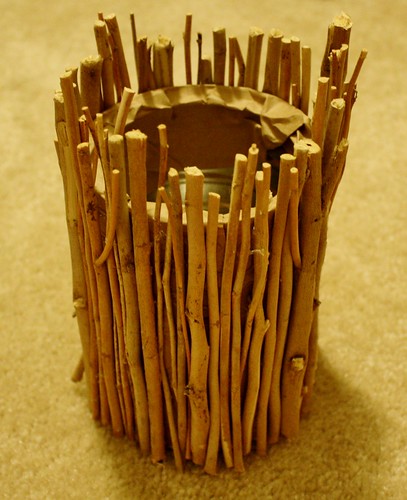
Use a hot glue gun to glue down the sticks all the way around the canister. Make sure they're packed tightly together & you vary the different widths of the twigs. You don't want only skinny twigs on one side & thick twigs on the other. Then tie a bow around the middle with raffia or twine, add some flowers, & pat yourself on the back because you just made something super adorable :]
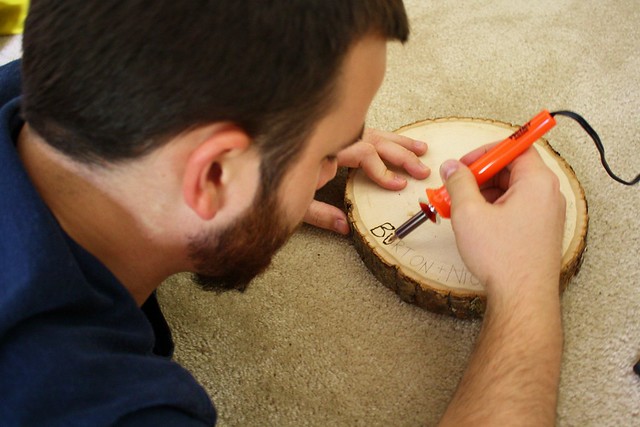
Burton & I decided to burn our names & wedding date into wood slices for the base of our centerpiece, for an added touch. Next to our centerpieces we're also going to make little tea votives, inspired by this tutorial, but I'll have to show you those pictures some other time because we're currently buried in a couple hundred stained & unstained clothespins :] In the mean time, how do you like?
 I try to add something lovely to my life every day. My dream is to live a crafty, happy life in Portland OR, with my husband, Burton :]


this might be my fave so far!
ReplyDeletethanks, Belinda! they luckily turned out just as I envisioned them :]
ReplyDelete